Last fall Kelly bought our friend Stephanie's old cedar chest for me "fix up". We decided I would remake it into a chest for grandson, Freedom, who is turning two years old on Friday. I made a chest for his brother, Kellen, years ago when he was two years old. Here are pictures of the chest upon arrival.
As you can see the top had lots of stains and abuse over the years and most of the finish was worn off.
There were several boards on the front and back which had cracked and needed to be aligned and glued. After straightening and gluing the cracked boards I sanded all the finish off the entire chest.
Cedar is not a nicely grained nor colored wood. It is used for cedar chests because the smell of the cedar wards off moths. Cedar is often used to make bulky, cabin-type furniture with a clear finish on it. For this remodel I decided to stain the cedar as dark as I could and add lightly stained white oak trim pieces. Since this will be a boy's toy chest, or treasure box, I took off the two small hinges and replaced them with a piano hinge. Since Free is small and will be in and out of the box, I bought special torsion rods that hold the lid up in various positions. I had a little plaque made to hide the hole where the lock had been. I also made square legs to replace the "mid-century modern" tapered round legs. Here are the "after" pictures. It came out nice. Now I have to get it to California!
Next project - Doll House repairs:
Daughter Alexa bought a homemade dollhouse at a yard sale last year for the granddaughters, Violet and Wren, ages six and three. She brought it to our house for me to make some repairs and for family members to work on making room decorations for it. It is 1" equals 12" scale so it is pretty good size. The first things I saw that needed repairing was the front door and the missing roof shingles.
THE FRONT DOOR:
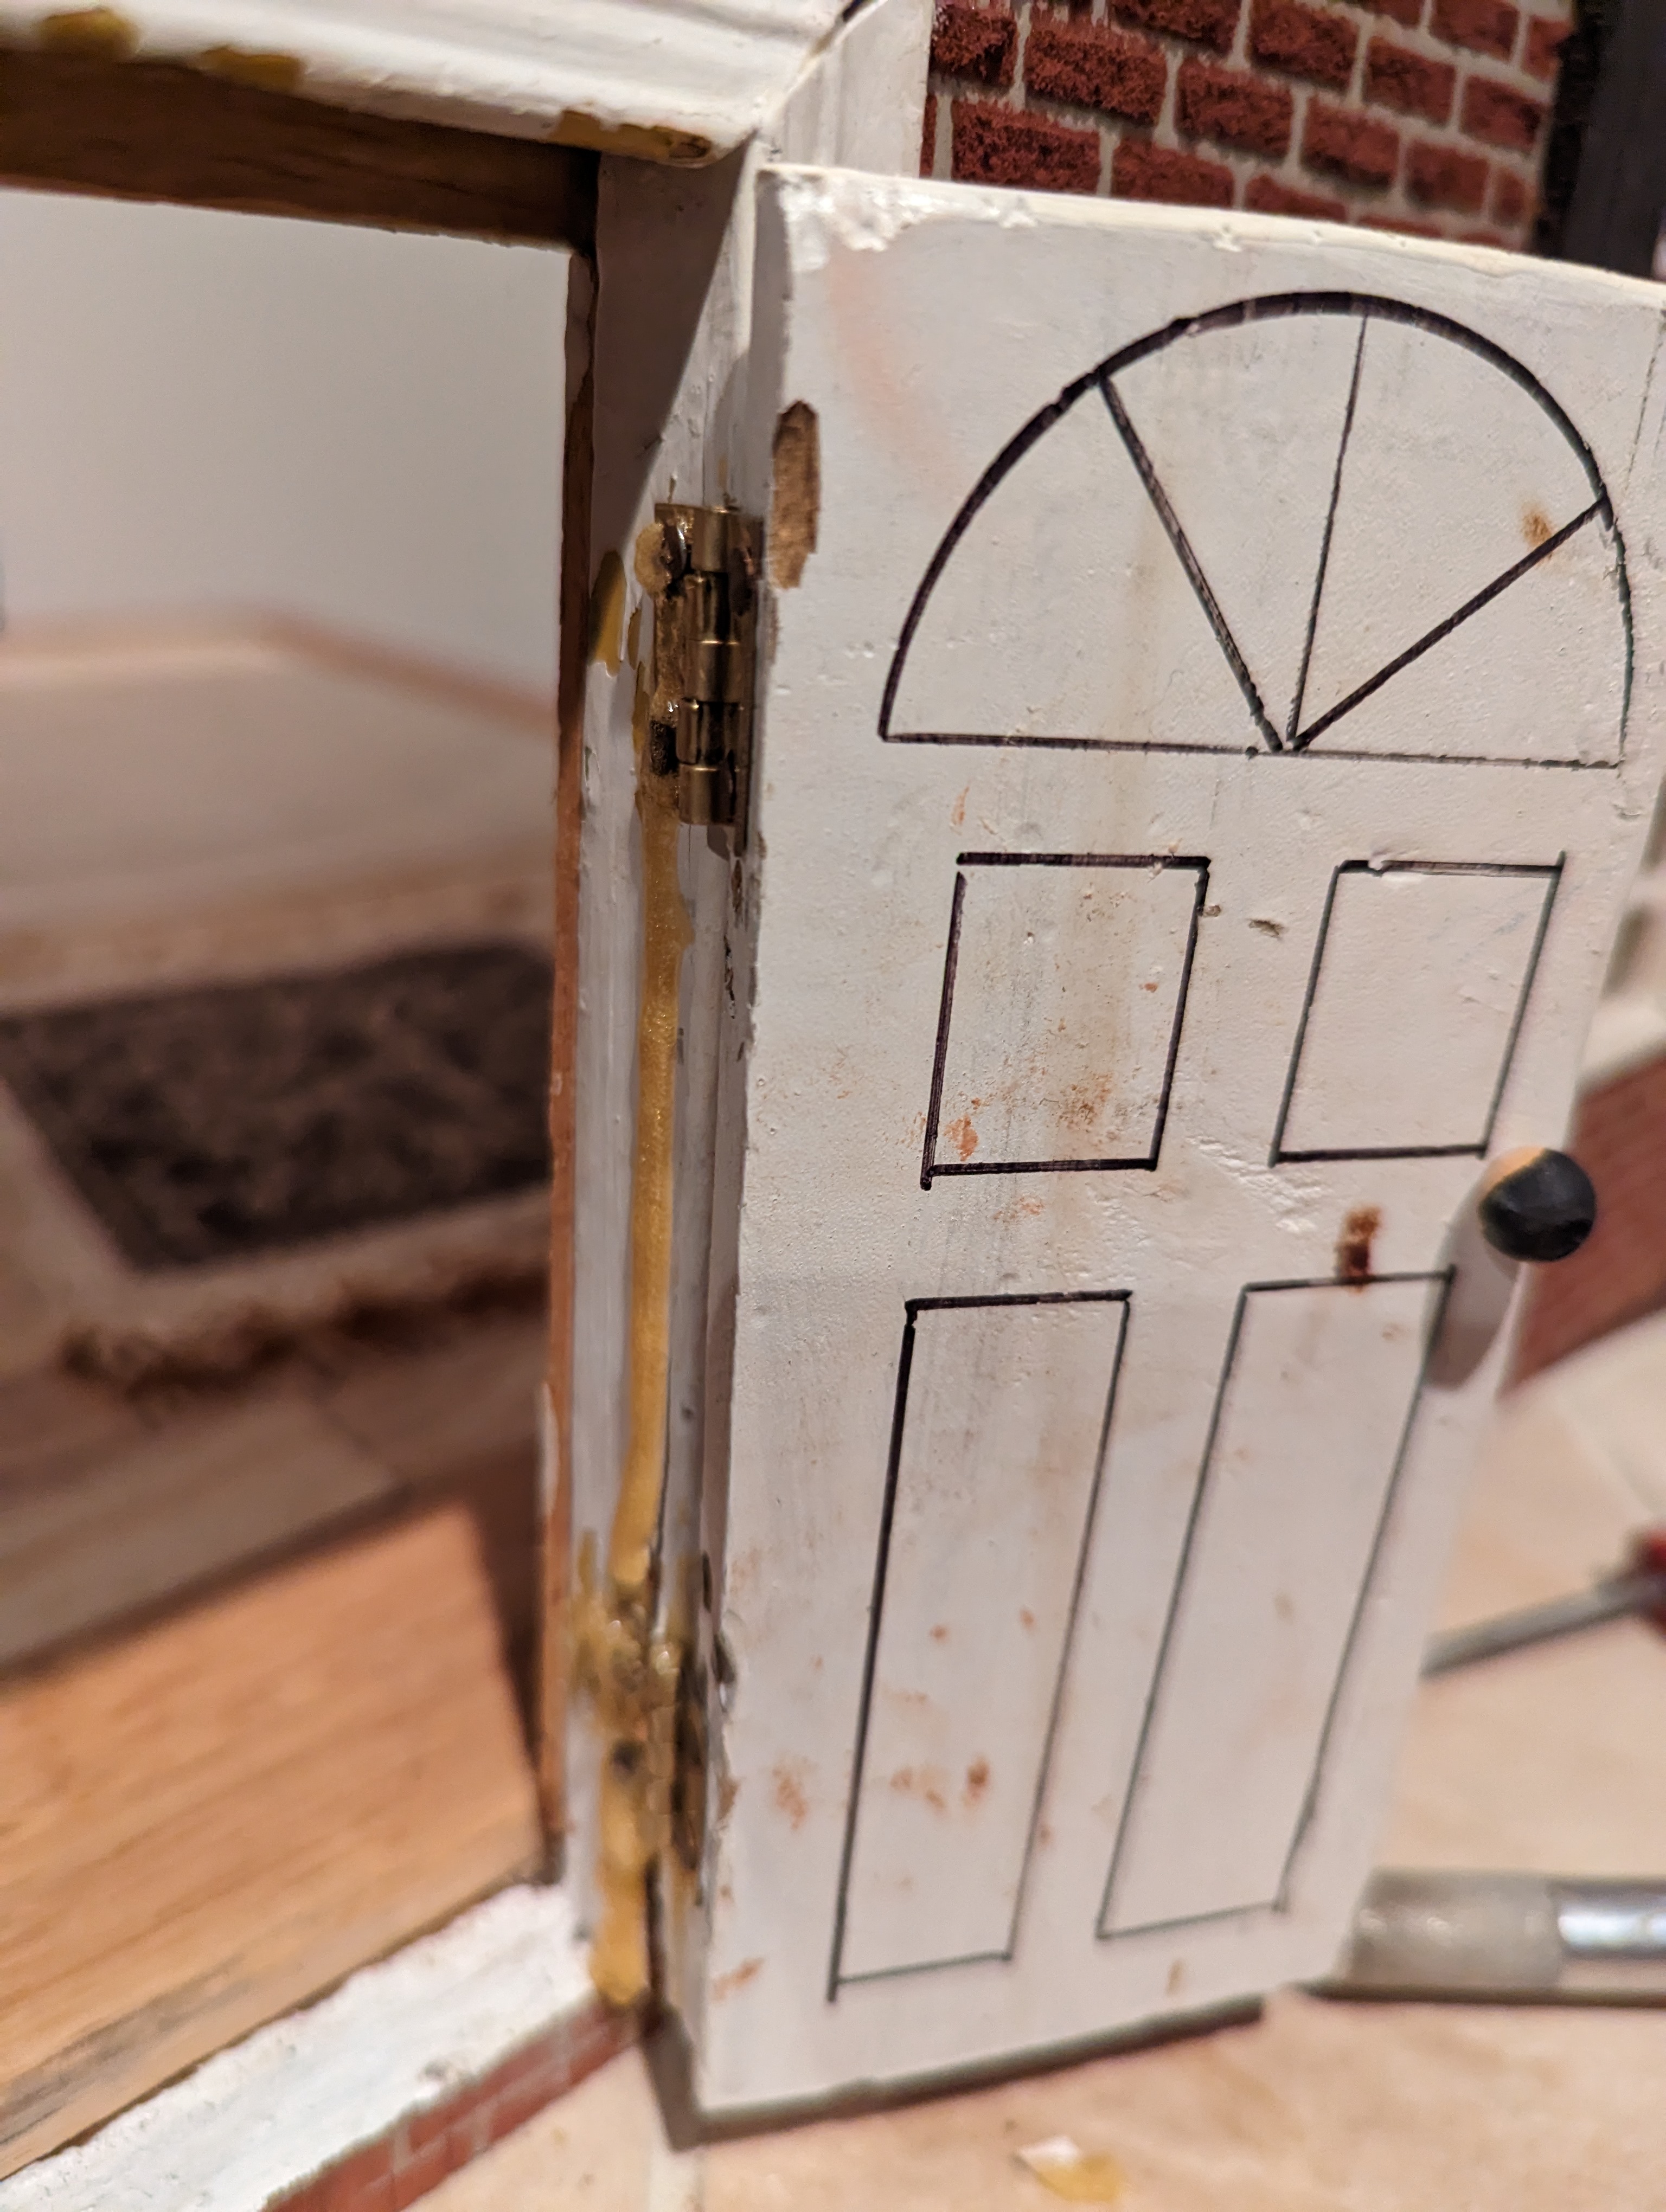
The front door apparently came off at some point and the hinges were then nailed and glued on with Guerilla Glue. Unfortunately, the nails went into the trim rather than into the wall itself so they came through and split the molding. Here is what it looked like. In the first picture you can see the nails sticking out and the glue slopped all over.
Here is another picture of the glue slopped on the inside of the door frame. The door itself is in rough condition as well.
I carefully pried the door off in order to make repairs. Big chunks of wood in the door trim are missing due to the nails splitting the wood.


The door needs to be screwed on rather than nailed on to be able to withstand the abuse by young girls pulling it open and closed. Also, there is no way to use a hammer in the three-inch-wide doorway to properly nail the hinges back on where they need to be in the framework. I looked all over town for small screws that would let the hinges close properly. I couldn't find any small enough. I bought the smallest ones I could find and used my small Worx power screwdriver to mount the hinges, in the correct place on the frame and on the door. I then removed all the screws and ground their heads down so that the hinges could close properly. I had to be careful not to grind the heads too much or there would not be enough head to allow me to reinstall them. This operation was a success. I removed the door and made some adjustments to it so it would fit properly in the opening. I still have to decide how to keep the door "latched". I used wood putty to fix the broken-out spots of trim caused by the use of nails for the hinges. The framework is ready to paint.

The door had a "entry door" design marked on it with a Magic Marker. Alexa didn't like that. You can't paint over Magic Marker, it will bleed through.
I sanded all the marks off and then used the woodburning kit, which I got from daughter Erin for my birthday, to burn in the pattern that is on the front door of our house. I learned quickly that it is really hard to burn a straight line due to the grain of the wood. It will do. I think we should paint the door yellow for a little flair. Alexa will make that decision.
ROOF SHINGLE REPAIRS:
The other repair I noticed right away was a number of shake shingles missing.
I got online and found that these shingles are sold in strips to roof an entire doll house. The cheapest ones I found were $40.00 for a whole bag of shingle strips. Since I just need some replacement pieces, I decided to make my own by chiseling off pieces of wood and cutting them to fit where needed. I think they worked out pretty well.
The roof hinges up in the back to access the attic. Because of use over the years the entire lowest level of shingles were loose. I replaced all the broken ones and then glued all the loose ones in place.
I painted the new shingles flat black to blend in with the rest of the roof, which will get re-stained soon.
The granddaughters will be here visiting from California in July so they can play with the dollhouse then. Their mom ordered some appropriately sized dolls to be shipped here that can inhabit the dollhouse and hopefully provide hours of entertainment. This too will have to find its way to California at some point like the chest.
.jpg)
.jpg)
.jpg)
.jpg)
.jpg)
.jpg)
.jpg)


.jpg)
.jpg)
.jpg)
.jpg)
.jpg)

.jpg)

No comments:
Post a Comment