Edger repair:
I have a John Deere lawn edger that is at least forty years old. I bought it from the County at an auction for $35.00 about fifteen years ago. It has a Briggs & Stratton engine and the edger itself is built like a tank. It hadn't been used in many years. I originally got it running by soaking the carburetor in carburetor cleaner for a couple of days. After about a year it wouldn't start so I took it to the shop. They had to rebuild the carburetor because the diaphragm inside had dried out from old age. After a carburetor rebuild I was back in business.
The edger worked fine until last fall when it started dying while in use. I noticed that the bolts attaching the intake manifold were visibly loose. After I tightened them it would run but the bolts would quickly vibrate loose again. I decided to take it apart thinking I would have to tap new threads into the engine block and install a larger bolt to keep the manifold tightly in place. I was not excited at all about tapping into the cast iron block.
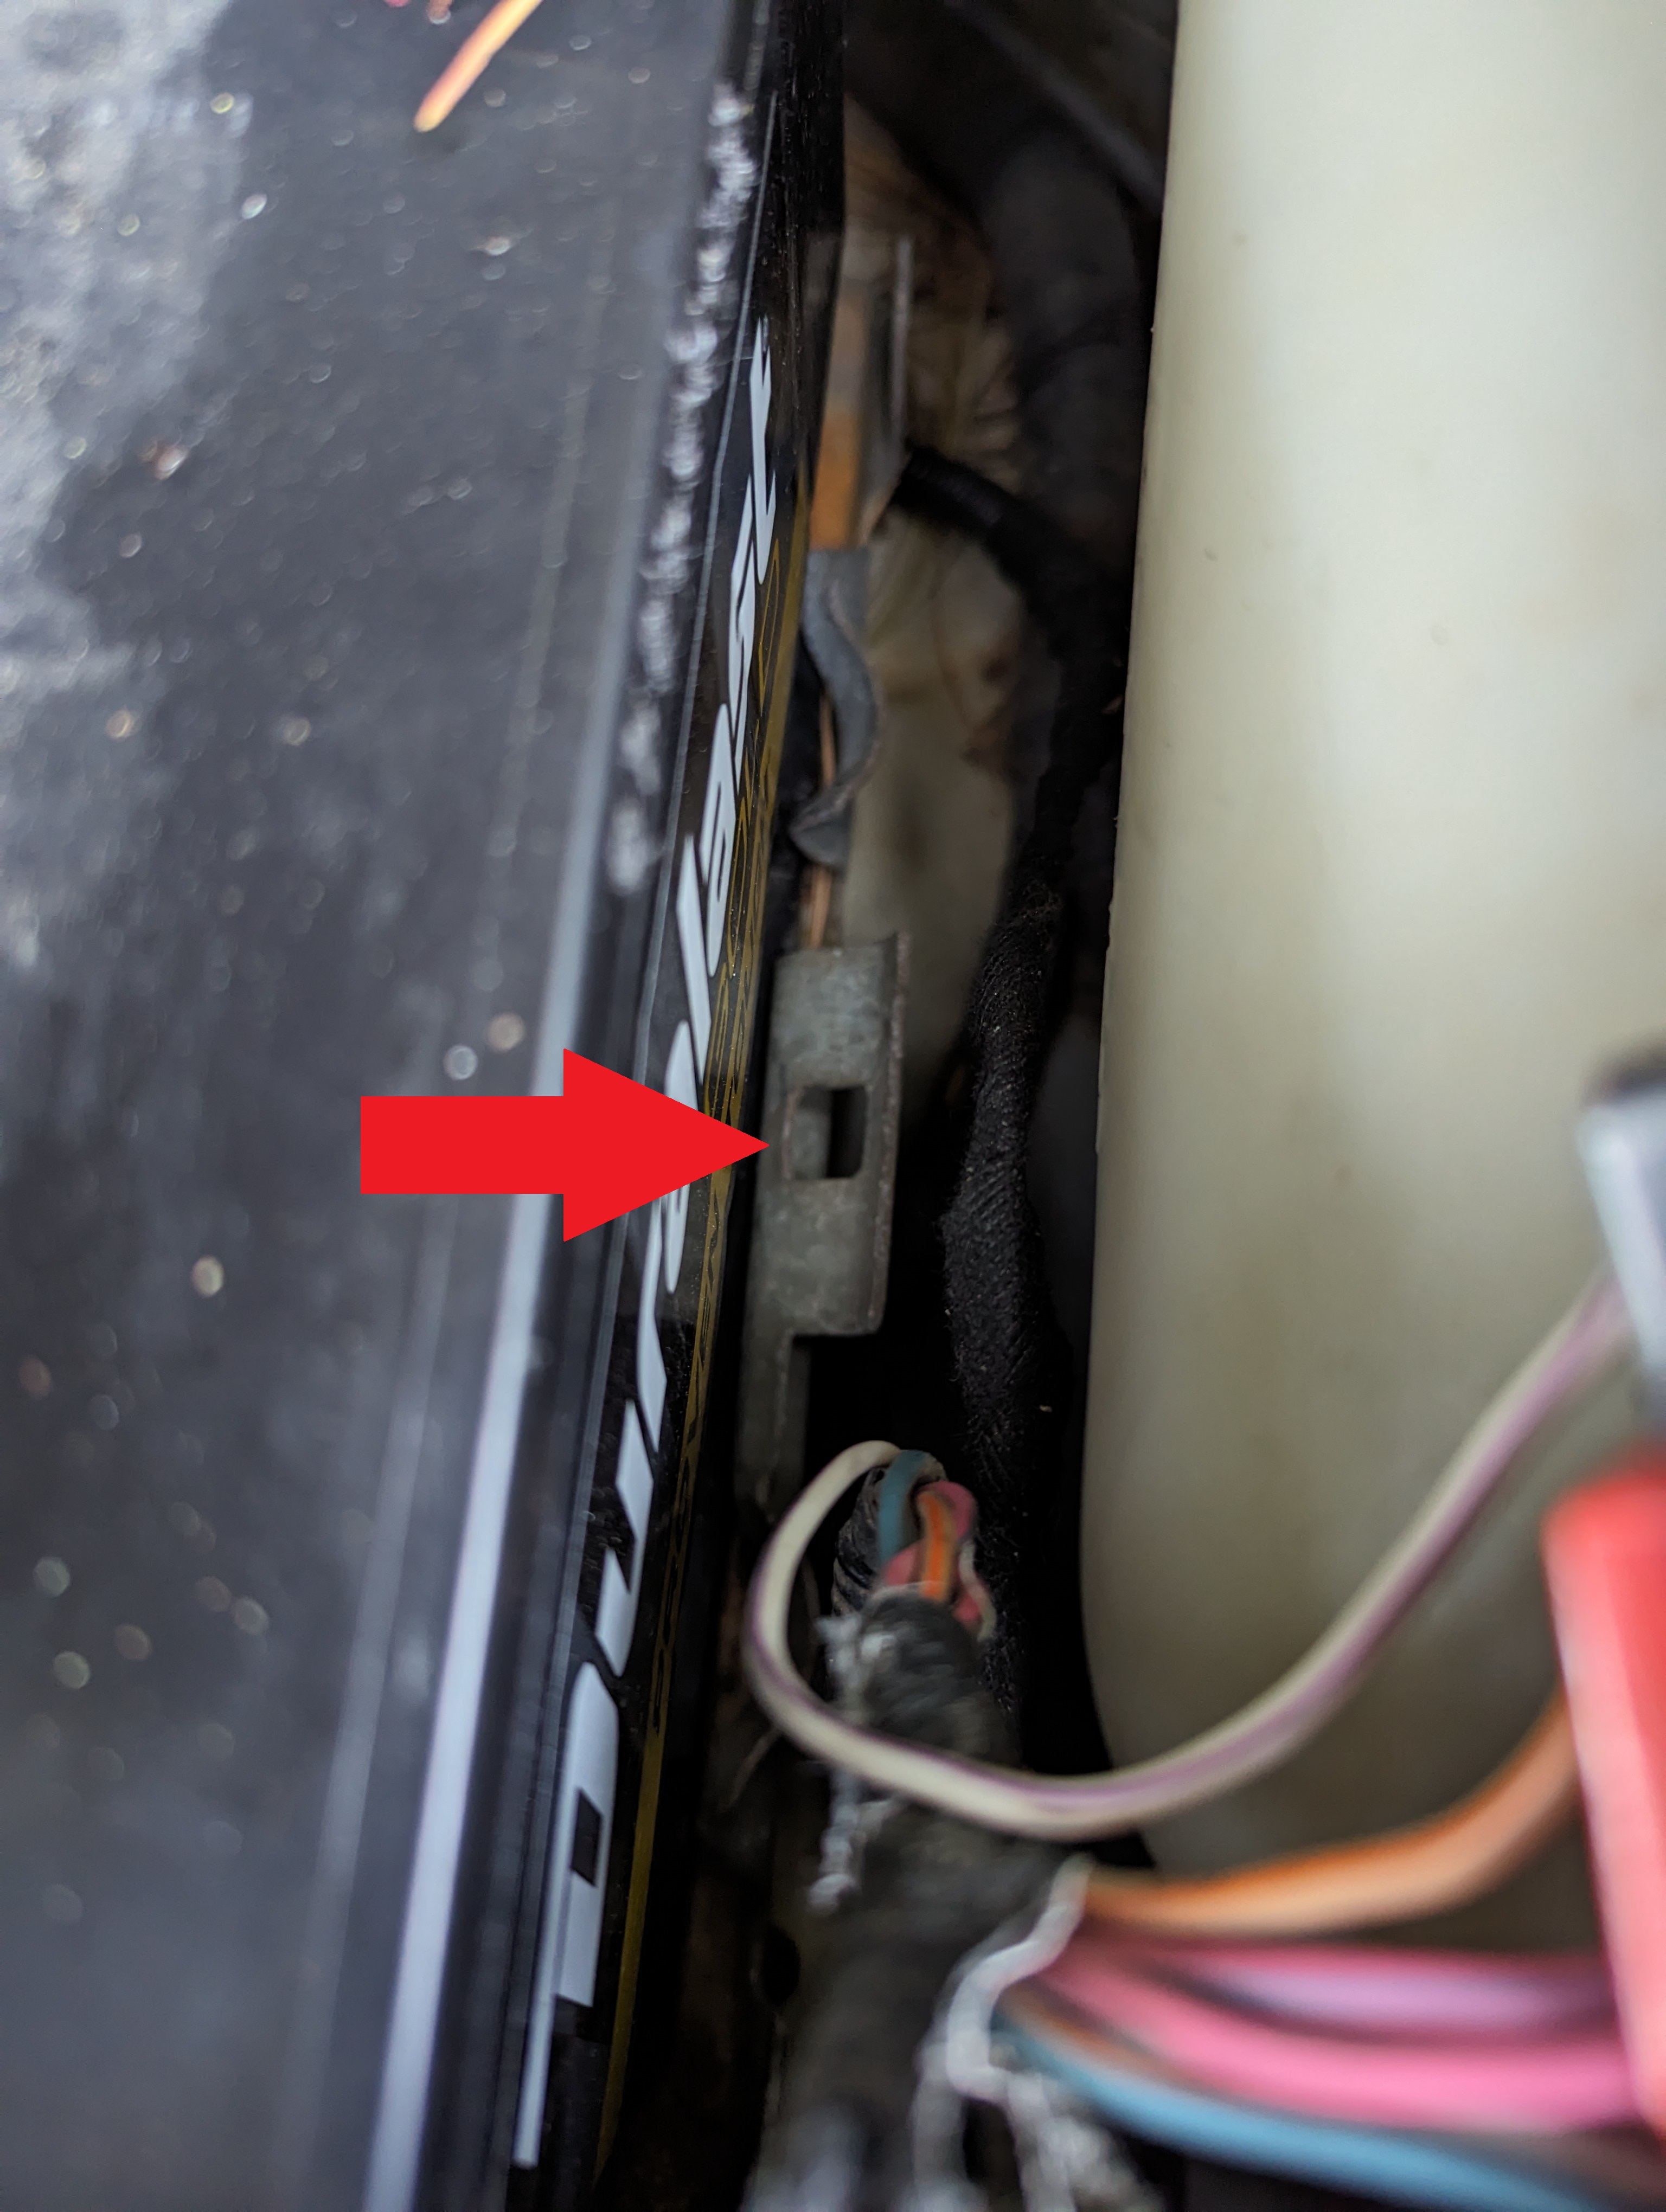
Another time last fall the small wire which comes out of the engine block area broke off. I didn't have the correct size of solid wire for a repair but I was able to solder on a piece of stranded wire which I had on hand. In the process of soldering on a new piece of wire, the circuit board, where it attaches to the intake manifold, broke in half. I superglued it back together and luckily it had been holding. While making the current repair I broke the little circuit board again.
In this picture the red arrow points to the small circuit board and the green arrow points to the wire repair.
I again repaired the circuit board with superglue but this time I reinforced it by super gluing on a fiber washer.
The intake manifold is not easy to get off. I had to unbolt the motor from the frame in order to lift the motor high enough for the fuel tank to come off for access to the bottom manifold bolt.
When I pulled off the intake manifold I could see that the threads on the top bolt in the block were worn off. I was going to begin the tenuous process of tapping new threads into the block when I had an idea. Maybe the inner threads were still good and a repair could be made just by using a longer bolt.
I bought a longer bolt and it seemed to tighten up fine. Unfortunately the bolts only come in certain lengths. I was reluctant to cut it off leaving a rough end due to issues with the threads in the block. The new bolt bottomed out in the block. It did seem to tighten adequately though so I added a couple of extra lock washers to take up the slack. The lower bolt hole went all the way through the block so it tightened nicely.
In addition to having to get the gas tank off to get to the bottom manifold bolt, it is a bugger to get out because of close proximity to the manifold. A socket wouldn't fit it and a closed end wrench wouldn't fit it. With an open end wrench you could only turn the bolt about an eighth of an inch at a time. To improve this issue I bought an Allen bolt for the bottom bolt. An Allen bolt has a much smaller head, making it easier to get the bolt out in the future. The green arrows point to the new bolts installed. I put heavy duty "Lock Tight" on all the threads before inserting the bolts. I painted the top bolt and lock washers with white paint so I could monitor if it loosened.
.jpg)

After everything was back together I gave the rope several pulls but it would not start, this is not unusual for a gas motor which has been sitting over the winter. I sprayed a little carb cleaner into the carburetor and it fired right up. I edged the entire lawn with no problem. I'm hoping this repair will last my lifetime.
I also decided it was a good time to replace the belt which was stretched a little and getting frayed. I couldn't believe this little belt cost $22.00, making this about a $30.00 repair.
Fountain repair:
John called the other day and said the fiberglass fountain in his front yard had a big crack in it causing all the water to leak out. He wondered if I could repair it.
I had brought home from Florida a large piece of fiberglass mesh and the fiberglass resin left from the busted fender repair on the golf cart. This material would certainly work for this project. Here is a picture of the fiberglass repair after two layers of mesh and resin.
Bondo is a putty-like material used in repairing rust holes and dents in cars. It sets up quickly and hard as a rock. We used this to repair a one inch hole in a separate fiberglass piece of the fountain. There were several cracks in this piece nearby so I spread Bondo all over the area to strengthen it. The Bondo color blends quite well with the surrounding "rock" look of the fountain.
Later, while looking at the smaller fiberglass piece closely I found another area with several cracks, probably just due to old age. Here is a picture showing several of the cracks before I spread Bondo over them to curtail the cracking.
The following day I spread Bondo over the mesh repair on the large piece of the fountain. The repair is on the underside so it won't show. The fiberglass mesh and Bondo should make for a solid repair.
This picture shows Bondo spread over the additional cracks found on the smaller piece of the fountain.
The test is "Will it hold water?". I took the pieces outside and filled the larger one with water. It sat for two days and not a drop of water leaked out. It holds water, which is pretty important for a fountain. LOL. John picked it up and reinstalled it in his yard. Good for another ten years we hope!
LP Grill Repair:
Outdoor propane grills quickly deteriorate due to their cheap metal construction. Kelly's theory is that they are built this way to sell new ones every few years. I believe she is right. These grills are not cheap to buy yet many components rust out in short order. Our current grill was given to me by John a couple of years ago when he bought a new one (because this one was rusting out). Even rusting out his was in better shape than the one I was using at the time. I have kept this grill and the previous one covered when not in use, but that does not seem to slow down the deterioration of the internal parts.
One of the parts to rust away in a very short time is the tray located below the burners which catches the grease. You would think having a lot of grease on it that it wouldn't rust but it doesn't work that way. On this grill the tray had been repaired three times. I think John repaired it twice and I repaired it once with pieces of sheet metal. Here is a picture with arrows pointing to previous repairs.
As you can see, the edge of the tray has now rusted away allowing it to bend down and leaving no integrity for further repairs. The entire tray was hanging down ready to fall out. Because of this the grease has been running down and on to the LP tank below, making quite a mess. As you can see in the picture the factory tray had a square opening where the grease is supposed to run into a removable grease cup below.
This tray is clearly beyond repair. One can probably buy a replacement online but I imagine it would cost more than the grill is worth. I came up with the idea to make my own tray using aluminum cookie trays, which would not rust. Kelly had one such cookie sheet in the cabinet. I went to Walmart and purchased a matching one for $12.00. (Of course I had to replace Kelly's cookie sheet so the parts actually cost $24.00.)
.jpg)
I had measured the area and determined that two of these cookie sheets screwed together would span the width of the grill. With the help of my grinder I cut off the corners of each pan and pounded one edge flat on each tray. The two pans then spanned the width of the grill with about an inch and a half overlap for attachment to each other. I screwed the two sheets together and into a piece of plywood on the backside for support. I then bolted strips of metal to each lip to provide more needed strength. Here is a picture of my tray. The reinforcing metal strips are on the outside of the pans but you can see the four bolts on each end.
With a little "persuasion" to the metal frame above, the new tray slides in and out for easy cleaning in the future. There will be no box to collect grease. I will just have to check it more often to make sure the grease doesn't overflow. In this photo, with the tray installed, you can see the wood and metal supports.
This repair ain't "pretty" but it is out of sight and will clearly outlast the rest of the grill. While doing this repair I noticed that the metal wall that the backs of the burners mount to is rusting away as well. If I get use out of this grill for a couple of more years I will be happy. I refuse to pay the price of a new grill knowing how quickly they deteriorate. Used grills are readily available for purchase online for a quarter or less of the price of a new grill. I'll start looking for a replacement grill when the next component fails. LOL
HHR door handle:
Tuesday I ran some errands. When I got back home I pulled on the door handle to get out and heard a loud snap as it opened. I realized something broke because I had a floppy door handle hanging in the door. Here is a picture.
In looking behind the handle I could see that the handle was plastic and it had cracked. When it did the handle pulled off the pin and spring that are in place for it to operate properly. The yellow arrow points to broken the area. Did I mention I hate plastic?
I got online to look for a replacement. I ordered a new plastic replacement handle for $9.99. A metal one is available for $21.50 but I figured the car (nor me) will be around long enough for another plastic handle to break.
On another note, three out of four speakers in the HHR didn't work, both front ones, and one back one. I got online and learned that this is a common problem on the Chevy HHR for some reason. The inside door panel has to be removed to make the handle repair, as well as replacing the speakers. I ordered new speakers for the front doors so I could install them when I installed the new handle. I ordered OEM speakers so that I wouldn't have to deal with clipping the wires, adapting the speakers to the door, determining polarity, soldering on the wires, etc. It was $72.00 for the two speakers, which are "plug n play". Both the handle and speakers arrived in two days.
I figured putting the new handle on may take more than two hands so I asked John to come over and help with the install. Following a YouTube video we got the door panel off and went to work. I thought the hardest part of the install would be getting the new pin and spring in place. That proved quite easy once we figured out how the spring needed to be oriented. The more difficult step was reinstalling the cable that goes from the handle to the lock. It wasn't complicated but it proved a bit challenging. In any event, the handle was installed in about an hour and we were ready to install the new speaker in that door.

The speaker has a lip on the bottom that fits into the door. The top is then bolted to the door. After we unbolted the top and popped off the speaker we found a wire tie bracket holding the wires to the speaker. This bracket keeps the wires from being pulled out of the plug on the speaker. I don't know how necessary it is but we wanted to install the new speaker exactly as the old one.
After a little bumbling around with it, John came up with the great idea of making it easy on ourselves by just cutting the plastic section of the speaker that held the wire tie bracket to the speaker. We did that and then pushed the wire tie bracket into the new speaker, plugged it in, and tested it. Sound blasted, good as new. Also the door chime started working again. I never realized that sound came out of the door speaker.
I did say we cut a section of the plastic speaker frame. I had never seen a plastic speaker frame before. The ones I have seen over many years were all metal. While I hate plastic, in this case the speaker frame being plastic made for an easier install.
We got all the door panel clips reinstalled and found that the bolts in the arm rest would not line up. We had to pull all the clips out to determine what was the cause of this misalignment. We found that the middle of the door panel, where the arm rest is located, wasn't going in far enough for some reason. We adjusted the panel and upon snapping everything in place the bolt holes lined up. Here is a picture of the speaker grill which is built into the door. It all looks like new and sounds great.
After the driver door panel was buttoned up we moved to the passenger side to put a new speaker in that door. After installing the first speaker we knew that we did not have to take the entire door panel off to make a replacement. We only needed to pull the panel loose at the bottom far enough out to unbolt the speaker. This speaker install went like clockwork. Upon testing it also sounded like new. Now I have to decide if I want to buy a speaker for the driver side back which is out. A project for another day, if at all.
Here is a picture of one of the speakers we took out. Both speakers looked like new. I have no idea why they quit working but apparently this is a common problem with the Chevy HHR.
Speakers work by a magnet field moving the cone in and out. Over the years I have dismantled a number of old speakers to salvage the magnets. They are heavy duty and extremely useful around the shop. The bigger the magnet the better the speaker. Here is a picture of the two magnets I took out today. They are about three inches in diameter. Not very big per HI-FI standards.
A couple of weeks of projects completed since coming home from Florida.
On Sunday we head to Hermann, Missouri, via a train ride along the Missouri River. We are going there for John's birthday. Hermann is an old, historic German town in a county with numerous wineries to visit (and spend money). They have a tram that takes you from one winery to the next so you can do a lot of tasting and/or drinking without having to drive. Unfortunately the tram does not run on Monday so we will have to do our "wine tour" on Sunday after we arrive. Monday we will just hangout, walk around the town, taste the local German "wursts", have a nice dinner, etc. Typical tourist stuff.
We take the train back to St. Louis on Tuesday and then drive back to Perryville. Wednesday will be a packing day because we fly to Greece on Thursday for a two week tour on land and sea. We fly to Montreal, have a three hour layover, then a nine hour flight to Greece. I am not looking forward to the nine hour flight but I am looking forward to the sightseeing. It will provide many entries for the blog, which will be written when we get home. Stay tuned!


.jpg)
.jpg)
.jpg)
.jpg)
.jpg)
.jpg)
.jpg)

.jpg)
.jpg)
.jpg)
.jpg)
.jpg)
.jpg)
.jpg)

.jpg)
.jpg)
.jpg)
.jpg)
.jpg)
.jpg)
.jpg)
.jpg)
.jpg)


.jpg)
.jpg)

.jpg)
.jpg)
.jpg)
.jpg)
.jpg)
%20with%20arrows.jpg)
.jpg)
.jpg)
.jpg)
.jpg)
%20with%20arrow.jpg)

.jpg)
.jpg)
.jpg)
.jpg)
.jpg)
.jpg)
.jpg)
.jpg)
.jpeg)
.jpg)
.jpg)
.jpg)
.jpg)
.jpg)
.jpg)


.jpg)
.jpg)
.jpg)
.jpg)

.jpg)
.jpg)